Pen exercises
Getting used to the pen is very important. To do this, it is best to do a few simple exercises to get your hands moving. These exercises may remind you of kindergarten and the scribbles, but don’t let that fool you. Just like stretching before a run, you need to get your hand moving a little. When performing the exercises, pay attention to the following things:
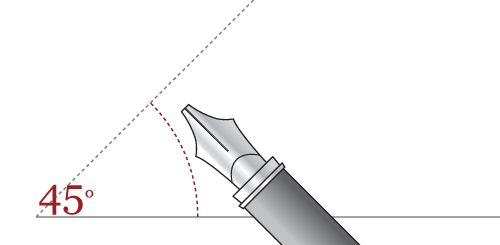
- the angle of the pen relative to the baseline
- the force with which the nib presses on paper
- the repeatability of figures and lines drawn


Depending on the script you will be calligraphing in the future, the angle of the pen in relation to the baseline of the typeface and therefore the hand position will differ. Therefore, it is worth repeating this exercise for different angles. In manual mastery of writing at different angles, sheets with drawn auxiliary lines are very useful. You can make them yourself with a protractor and pencil or download them from the website and print them out.
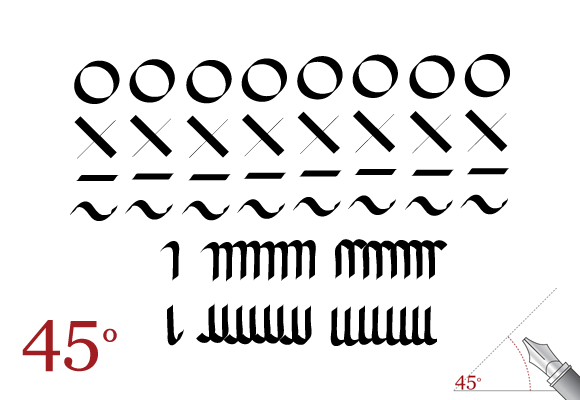
Here are some examples of patterns to help you master the pen.

The patterns drawn at a 30-degree angle at the pen are slightly different from those at a 45-degree angle.

The initial angle of the pen should be maintained when performing the exercises. This is important for several reasons. Firstly, it gives a consistent shape to the letters, and secondly, we learn to maintain this angle in the future. Of course, there are some exceptions to this rule. Sometimes it is necessary to draw a line with the pen held at a different angle to the initial angle. This gives additional possibilities in terms of the thickness of the lines drawn.
In some typefaces such as copperplate, it is permissible to rotate the sheet of paper in order to achieve the correct angle. In others, such a procedure is not recommended.


Recent Comments